Developing in Eclipse
MultiWii may be developed in a variety of different development environments. For those who wish to use Eclipse, there is a set of projects in the Subversion repository to make this easy to set up.
There are many different ways to set up an Eclipse environment to develop for the Arduino platform. This document describes one way to set it up under Windows. If you're using Linux, the concepts are similar, but the details will vary.
| This tutorial includes detailed instructions for setting up Eclipse to develop MultiWii on a Microsoft Windows system. Eclipse and the AVR plugin will also work on MacOS and Linux. Alternate instructions are noted below, where applicable. |
Contents
Needed Software
To set up your Eclipse development environment, you need:
- WinAVR - http://sourceforge.net/projects/winavr/files
- Eclipse IDE for C/C++ Developers - http://www.eclipse.org/downloads/
- AVR Eclipse plugin
- Subversive Eclipse SVN plugin
| If you are using MacOS or Linux, you can still use Eclipse and the AVR plugin, but you will need to find a native AVR or Arduino toolchain for your operating system. More info can be found here: http://avr-eclipse.sourceforge.net/wiki/index.php/The_AVR_GCC_Toolchain |
Software Installation
WinAVR
You can use either the standalone WinAVR tool set or the command-line tools that come with the Arduino IDE to develop in Eclipse. The Eclipse plugin finds the standaolone WinAVR automatically, so it's easier to configure. Install it in the default location to make sure the plugin can find it.
- Download WinAVR and install it using the default options
| If you are installing on Windows, be sure to avoid paths containing parenthesis, like Program Files (x86). The Eclipse AVR plugin will not function correctly with parenthesis in the WinAVR installation path. |
Eclipse
Eclipse comes in many different versions. You want the Eclipse IDE for C/C++ Developers. For this tutorial, I'm using the Kepler release. You can put it anywhere on your system that you like. You may wish to create a shortcut to eclipse.exe if you're using Windows.
- Download and unzip Eclipse IDE for C/C++ Developers
- Double-click eclipse.exe to start it
- Select a location for your workspace
AVR Plugin
The AVR plugin adds the ability for Eclipse to build Arduino code and download it to the flight controller.
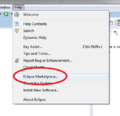
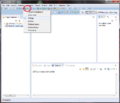
- Open the Eclipse Marketplace (Menu: Help->Eclipse Marketplace)
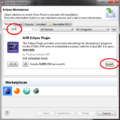
- Type "AVR" in the Find box and press enter to search
- Click Install" to install the "AVR Eclipse Plugin"
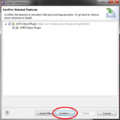
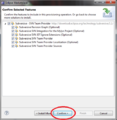
- Click "Confirm"
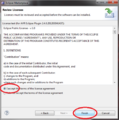
- Accept the license agreement and click "Finish"
- If you get a warning about unsigned content, click "OK"
- Allow Eclipse to restart itself
After the AVR plugin is installed, you should confirm that it was able to automatically find the AVR tools.
- Open the preferences (Menu:Window->Preferences)
- Expand "AVR" and click "Paths"
- Confirm that all of the paths point to where you installed WinAVR. The Atmel Part Description files will be blank.
| Configuring the Eclipse AVR plugin to find the AVR toolchain may be different under MacOS and Linux. See the links above for more information. |
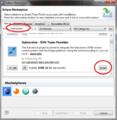
Subversive Plugin
You can use any Subversion plugin you like. This tutorial uses The Subversive SVN Team Provider because it's easy to set up. Subclipse is also popular.
- Open the Eclipse marketplace (Menu:Help->Eclipse Marketplace)
- Type "Subversion" in the find box and press enter
- Scroll down to find Subversive - SVN Team Provider
- Click Install
- Click Confirm
- Accept the license agreement and click Finish
- Allow Eclipse to restart itself
Source Code
The MultiWii source code is managed in a Subversion repository: http://multiwii.googlecode.com/svn/.
The latest development version of the code is in the MultiWii_shared directory. This code is to be kept IDE-independent, so the Eclipse projects are stored nearby, in the IDEs/Eclipse directory. There are two projects located here: the Arduino core library and the MultiWii firmware itself. The MultiWii firmware project uses an svn:externals tag to automatically include the code from the MultiWii_shared directory, but you don't need to understand what that means to get started.
Setting up the Subversion Repository
The easiest way to get the projects into your Eclipse workspace is to check them out from within Eclipse using the Subversive plugin.
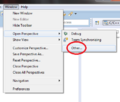
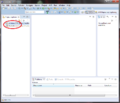
- Open the SVN Repository Exploring perspective in Eclipse
- Select Windows->Open Perspective->Other
- Select SVN Repository Exploring and click OK.
If this is the first time you have used Subversive, you will be asked which connectors to install. I recommend installing both versions of SVN Kit, which will allow you to work with any Subversion repository.
- Select both versions of SVN Kit and click Finish
- Click Next
- Click Next
- Accept the license agreement and click Finish
- You may get a warning about installing unsigned content. Click OK
- Allow Eclipse to restart itself
Checking out the Source Code
To check out the source code, you first need to configure the repository.
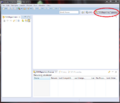
- Select the SVN Repository Exploring perspective, if it isn't already selected
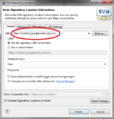
- Click the New Repository Location button
- Enter the URL: http://multiwii.googlecode.com/svn
- If you are a committer, you will need to use the https URL and enter your credentials
- Click Finish
Then, check out the projects
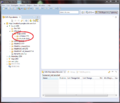
- Expand the tree under the repository to locate the Arduino' and MultiWii projects
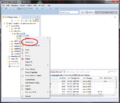
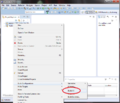
- Right-Click on Arduino and select Check Out
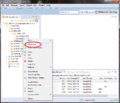
- Right-Click on MultiWii and select Check Out
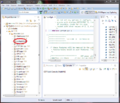
- Switch to the C/C++ perspective. You should see the two projects
Project Configurations
The Eclipse projects are set up with configurations for the standard Arduino board configurations. You may be able to use one of these configurations, or you may need to edit them to get them to work for you. The basic configurations are:
- Standard - Most boards with a 328P MCU and six analog inputs
- EightAnalogInputs - Most boards with a 328P MCU and eight analog inputs
- Mega - Most boards with a 2560 MCU
- Leonardo - Arduino Leonardo with a 32U4 MCU
- Micro - Arduino Micro with a 32U4 MCU
All of these are configured for a 16MHz clock. If your controller has a different clock speed or a different MCU, you may need to create a new configuration or modify one of the configurations in your copy of the code.
Building
Arduino
The Arduino project contains the Arduino core library. You probably just want to build all of the configurations up front and not bother with it again.
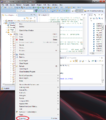
- Right-Click on the Arduino project and select Build Configurations->Build All
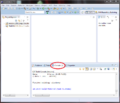
- Click on the Console view to see progress during the build
MultiWii
You can select just the configuration you need and build only that configuration while you are developing. It will automatically use the correct version of the Arduino core library.
- Click on the MultiWii project to select it
- Edit your config.h file to configure the source for your aircraft and controller
- Be sure to save your files (SHIFT-CTRL-S) before building. Eclipse does not use the in-memory edited file like the Arduino IDE.
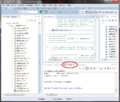
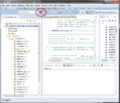
- Click on the arrow next to the hammer icon in the toolbar to select the configuration you want to use.
- Make sure the MultiWii projet is selected and click on the hammer icon to build it
- Check the Console view to make sure the build was successful.
Uploading to the Controller
Once you have your firmware built, you can upload it to your controller using AVRDude from within Eclipse. This requires you to first configure a programmer.
Configuring a Programmer
There are lots of different hardware programmers. In this example, I'm using an FTDI Basic Breakout on COM3 to program a board that has an Arduino bootloader. You may need something different.
- Right-click on the MultiWii project and select Properties
- Open AVR->AVRDude
- Click New... to add a new programmer configuration
- Give your programmer configuration a name
- Select your programmer hardware
- Type in the COM port to use
- Select the baud rate to use
- Click OK
- Click OK
Note: you may have to re-open the properties dialog and select the programmer you just created from the list. This appears to be a bug in the Eclipse plugin.
| The procedure for configuring a serial port is different under MacOS and Linux, and not covered here. |
Programming the Firmware
Once you have built the MultiWii firmware and configured a programmer, you can upload the code to your board.
- Click the AVR upload button in the toolbar
- You can see the AVRDude output in the Console view

